Pages

Monday, October 1, 2012

Marshmallow Fondant

Time to get sticky, girls!

The idea of making my own fondant has never crossed my mind before until I saw a whole jar of untouched marshmallow on the counter. For me making hand-made fondant was meant for baking experts only. And I'm not one of those baking expert... YET! ;-)
As always, Mr.Google and Ms.Youtube do not let me down. There are a bunch of ideas and tutorials I can find on how to turn the marshmallow into something useful. 

Making your own marshmallow fondant is not as difficult as you might have imagined. It's just messy and sticky. If you have kids and not afraid of letting your kids get dirty and messy, I believe this is a must-do-together activity. Lots of fun guaranteed. 

Let's get started!

What you might need :
A package of marshmallow
A couple tablespoon of water
Lots of powdered sugar
Food coloring if needed.

Once you get all ingredients, then you are ready to get set and go....


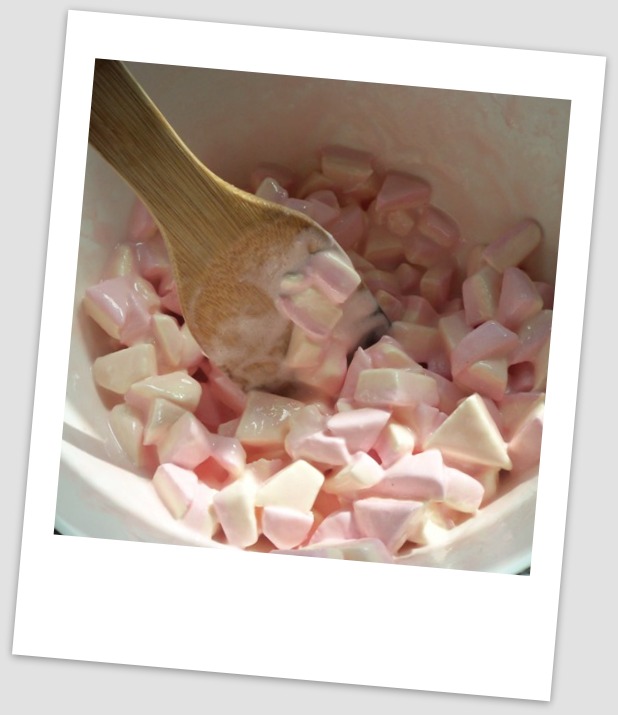
1. Get some of those mini white marshmallow if it's possible for you to find. It will make your life easier. Unfortunately mine were big chunk kind of marshmallows, so I had to cut them all in small pieces to make all of them easier to melt. Fortunately, they were already in pink and white coloured. I need some pink fondant for my next project. So I won't need to colour them anymore.

2. Pour a couple tablespoon of water on your marshmallow. Toss it in the microwave for about 30 second. If you don't have any microwave, you could melt them using the double-boiler method  Put the bowl of marshmallow on top of a pan with hot boiling water and set it on a low heat. Keep on stirring until it all melt completely.

3. Check out your marshmallow every 10 second and give it a little quick stir before popping it back in to the microwave. 

4. This is how the end result of the melting process. Take it out of the microwave.

5. Pour powdered sugar into melted marshmallow. Stir it using wooden spatula.

6. Keep on pouring powdered sugar and stirring it until you get quite an elastic texture and you are able to take it out of the bowl.

Now, get ready for the sticky part. Before you start handling marshmallow with hands, cover all parts of equipment you will be using with some butter. The original tutorials I watched mostly use vegetable shortening to grease. I don't have any. So, I just use butter. Also, very important to grease your hand up to your wrist. Trust me, you don't want all those sticky sweet thing covering all of your body part. 

7.  Spread generous amount of powdered sugar on to your already-greased table.

8. Put your marshmallow on top of the powdered sugar. Pour again generous amount of powdered sugar on top of marshmallow. 

9. Start knead it like kneading bread dough and keep on pouring powdered sugar to prevent it from sticking to your hand. Knead it continually until fondant gets firmer and not sticky anymore. 

10. Once you are satisfied with your fondant, wrap it around with plastic wrap and let it chill in the fridge for a couple of hours. 


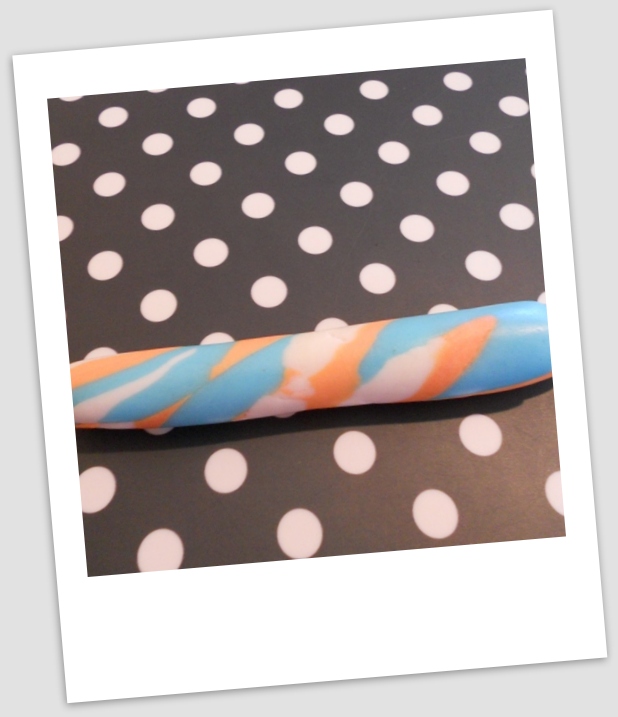
Then your fondant is ready to be transformed into any creation. You can colour the fondant using any food colour you wish.

Have fun creating ;-)

N


Tuesday, September 11, 2012

Fresh Key Lime Cupcakes


Key lime ,which also known as "jeruk nipis" in Bahasa Indonesia, is not only common to be added to your main dish or fish meal. This small round green fruit basically can be used in any kind of food and beverages. Not only that it is very fresh when used as cold beverages, such as lime squash, it is also can be added to produce killer cocktails. But as for now, I will add some of this fruit to my basic vanilla cupcake and turn it into a fresh key lime cupcakes. The freshness flavour of the lime really matches to the warm summer weather we are having right now.

Let's get started!

You might need :
175 g butter, at room temperature
175 g sugar
175 g cake flour 
(The cake flour we are having here in Holland has a hint of lime flavour which suits very well to this recipe.That's why I am using the cake flour instead of plain one. But if you can't find any cake flour in your area, all purpose flour will do just fine.)
3 eggs
3 tbsp buttermilk 
(If you can't find any buttermilk in your area or don't know how to make it either, just use whole milk)
1/4 salt
1 tbsp lime zest
2 tbsp lime juice
1/2 tsp baking powder
1/4 tsp baking soda
a few drops of green food coloring (optional)

What you need to do ....

1. Pre-heat oven to 180C. 

2. Line cupcake tray with liners and set it aside.

3. Mix together all the dry ingredients in a big bowl (flour, salt, baking soda, baking powder). Whisk it or sieve it. I prefer to sieve it. Then set it aside.

4. Cream butter for a minute and add in sugar. Keep on mixing for around 5 minutes until the batter is creamy and pale. The longer you beat it the softer your cupcakes will be.

5. Add in egg one at a time, giving each egg time to incorporate with the butter mix before adding the next one.

6. Then add lime zest, lime juice and food colouring. The batter might look a bit curdled. It's fine.

7. Beat in 1/3 of dry ingredients into the batter alternately with 1tbsp of buttermilk. Do it until all the ingredients are finished.

8. DO NOT OVERMIX! Just mix it well enough to let all the flour and milk incorporated then turn the mixer off. I know how easy it is to get carried away while the mixer is spinning. That's why I usually prefer to use spatula while adding flour and milk. 

9. Once the batter is done, fill in 2/3 of the cupcake liners. If you have ice cream scoop, use it! That's one magic tool that will help you to divide the batter evenly. 

10. Bake it for about 20-25 minutes, 180C, or until a toothpick/skewer comes out clean when inserted. 

11. Let it cool before you frost it. 


Once they are cooled completely then you can start frosting them with your favorite icing/buttercream. And be free to decorate it as you like...


Wednesday, August 8, 2012

Simple Chocolate Mud Cupcake


Another chocolate cake post. 

It's a bit ironic when I think of how often I bake chocolate cake or cupcake and meanwhile I, myself, not a fans of chocolate at all. But somehow I like the smell of melted butter combining together with dark chocolate and forming a smooth mixture. I found this simple chocolate mud cake recipe on youtube and right away went to my kitchen to give it a try. 

There's no upcoming birthdays, no events or anything that requires me to bake any cake, but I will just bake some anyway and use it to practice on some new decoration ideas. 

The video comes from the  Simple Cooking Channel on Youtube. Just click on the name and it will direct you right away to the video. 
I didn't bake it in a baking pan, instead I used this batter to make cupcakes.

So, here we go

You might need :

2 cups of self raising flour
1 1/2 cups of castor sugar
200 gram of butter, melted
200 gram of dark chocolate, melted
3 eggs, beaten
2 tsp of vanilla extract
1/2 cup of instant coffee, cooled

Now, let's get your whisk and start beating.....

As always, pre-heat your oven and line-up your muffin tin with cupcake liners before you start mixing all the ingredients together.


Once your chocolate batter is set, pour it evenly to your cupcake tins. Bake it for 20-25 minutes with 180C oven. Or.. until your toothpick test comes out clean.


As you see on the picture above, the top of the cake is cracking. It's ok. In fact those cracks give a better crisp taste to your cake. Crispy above, moist inside. What can you ask more?


Tuesday, August 7, 2012

Heavenly Chocolate Cake as Base for Black Forest Cake.


It's been a while back since I wrote my last post. I have actually collected some pictures for my next writing, but I just haven't got the time to sit down and compose everything into the blog. Now, since we are finally back from our summer vacation and I have my extremely too much free time again, I will start posting some recipes and tutorials for you all to try.

For now it's the very moist chocolate cake that later will be turned into a black forest birthday cake for my lovely husband.

His birthday was exactly one day before we left for the vacation. And the whole week I've been spending more time browsing for ideas, tutorial and tips instead of getting ready for the vacation and starting to pack. This time my choice will be a chocolate cake, since chocolate is everyone's (my husband, sister and in laws) favorite thing except mine. 

I need to start going with a perfect birthday cake for his special day. After browsing through a lot of chocolate cake recipes, I finally found the one that looks very close to perfection. A perfect man deserves a perfect cake. 

So, let's get started.

What you need : unsalted butter    95gr
                dark chocolate     95gr
                granulated sugar   110gr
                egg yolk           90gr
                egg white          140gr
                sugar for egg white  50gr
                cocoa powder       15gr
                cake flour         80gr
                     

Let's mix them all together!!

1. Prepare your round baking pan and wrap the inside part with baking paper.

2. Whisk the flour and cocoa powder together. Sieve. Twice.

3. Heat butter until melted. Be careful not to let it melt too much that it gets brown. If you have any candy thermometer keep it around 80C when poured into the chocolate.


4. Pour the melted butter into the chocolate and stir until the chocolate is fully melted.

 5. Add the sugar and mix it with the chocolate batter.

6. Add the egg yolk and mix again. Set the batter aside for a while.

7. Prepare egg white in a separate bowl. 

8. Using an electric hand mixer beat it until the volume is up and pour in half of the sugar. Keep whisking it for a few minute then add again the remaining sugar. Continue beating until you get a stiff white cream. It is good enough when you see the curling peak when you pull out the batter.


9. Pour in half of the egg white batter to the chocolate butter mix. If the chocolate mix is harden a little bit, just give it a little whisk.

10. Add the sifted flour and cocoa powder and stir it gently. 

11. At last, pour in the remaining egg white batter and mix it until you get a smooth texture. 

 12. Pour the batter into a round baking pan and bake it in a preheated oven under 175C around 35 - 40 minutes.


 13. Do the toothpick test to your cake. If it comes out clean that means you can take out the cake and let it cool on the cooling rack. 

14. After it's been cooled then you can start decorating it.

I used this chocolate cake for a black forest cake. I cut the cake into 3 layers then spread each layer with raspberry jam first, top it with cheese cream butter cream and fresh raspberry fruit. Put the second layer and do the same filling as the first before covering it with the last piece of cake. I crumb coated it with simple icing and let it cool in the fridge for a few hours before I cover it with fondant and decorate.

He is very into coffee right now. Everything about brewing coffee and creating latte art. So, I decided to make a coffee-themed decoration for the whole cake. It was quite a  lot of work because I cover the whole side with little pieces of coffee beans made of fondant. But the result is very satisfying. 

Yup, I guess now it's really the time to  buy a nice cake stand. :-)

Check out more of my creations at www.MiNiBakes.nl


Wednesday, June 20, 2012

Baby Face Cupcake Topper Tutorial 


Now that the carrot cupcakes are done and cooled, it's time to give them a little touch up to make them more interesting. Since these cupcakes are meant for 2 years-old boys birthday, I'm thinking of making some cute baby face from fondant. At first I had this idea to make a small baby figurine to be put on top of the cupcake, but when I came to think of it again, wouldn't it be weird to eat a little baby? Even when it's only sugar paste figurine? So, I decided just to cover them with some cute faces. 

Let's see the steps of making this cute cupcake.....

1. First, cover the cupcake with your icing or buttercream. This time I am using cheese-cream butter-cream.. hhmm..redundancy. :-) Cheese butter cream. Sounds better. 


2. Then, using your rolling pin roll out the skin colour fondant. Since I could not find any skin colour fondant at the store, I mixed orange fondant with white and knead them together until I get the desired skin colour. Oh yeah, you might notice that I use my wooden rolling pin. Yep, I still don't have the fancy fondant rolling pin. It's a bit pricey for me, so I just use what I can find around the house. You can do the same. You can use empty bottle, glass or anything else you can find around the kitchen to substitute a rolling pin. Don't forget to powder it with a bit of flour so that the fondant won't stick to it. 


3. Cut the flatten fondant round. I use my round cookie cutter, but again you can use any round stuff around the kitchen. Be creative. Just make sure that the size is suited to cover your cupcake. 


4. Place the round fondant on top of your cupcake. Give a light touch to smoothen it. Try not to press it too much otherwise you might leave your fingerprints all around the fondant. 


5. After you're done covering the cupcake with fondant, set it aside. The next thing you want to do is preparing the baby hat to cover half of the fondant. This time I'm experimenting with some marbled effect. For that you might want to prepare 3 balls of different colours fondant. 
PS: Please note that I only use the fondants below for picture purpose only. That's why they are a bit small. If you intend to cover around 12 cupcakes, you might want to make bigger size of balls. 


6. Using both hands roll the fondants into sausage shape and lay them adjacent to one another.


7. Twist them together making one big sausage with colours overlapping one another. 


8. Do it several times until the colours blend to each other. 


9. Roll it again. And you might end up with this kind of colour.


10. This is how the other side would look like. You can choose the side you want to have. I choose this one.


10. Using the same round cutter you use for the cupcake cover, cut it round again.


11. With a knife, slice them into halves. 


12. Place one half on top of the cupcake. It will serve as the hat of the baby face. With a little brush, use a little of water to glue the pieces together. Fresh fondant usually is still easy to stick, but fondant gets hard very quick and you might want to use a bit of water as glue. 


13. You might also want to add up a little detail to the hat. It's all up to your creativity. I just poke little dots around the edge and make some stripes using a knife. Try not to cut it too deep. You just want to add some details and not cut it apart.


14. Here is how it looks like in the end.


15. Using the rest of the fondant, I cut a small stripe to add up a little detail at the bottom of the hat. 


16. Make a small tiny ball for the tip of the hat. Again, it's up to your creativity. You can also add a bow or anything you like. 


17. Now, let's do the face detail. Make 2 small holes to indicate where you want to put the eyes. Another small tiny ball for the nose and two small balls for the ears. 


18.  For the pacifier, flatten a small ball and add a tiny ball in the middle. Place it where the mouth should be. 


19. You can also carve a little smile instead of a pacifier. 


There it goes.... 
It's very easy right. You don't need any fancy tools to make this cute cupcakes. Go give it a try and share this sweet treats to people you love. They will love it. 


See this creation and more on www.MiNiBakes.nl